Wednesday, 10 December 2014

Energetically 'aged' Dresser


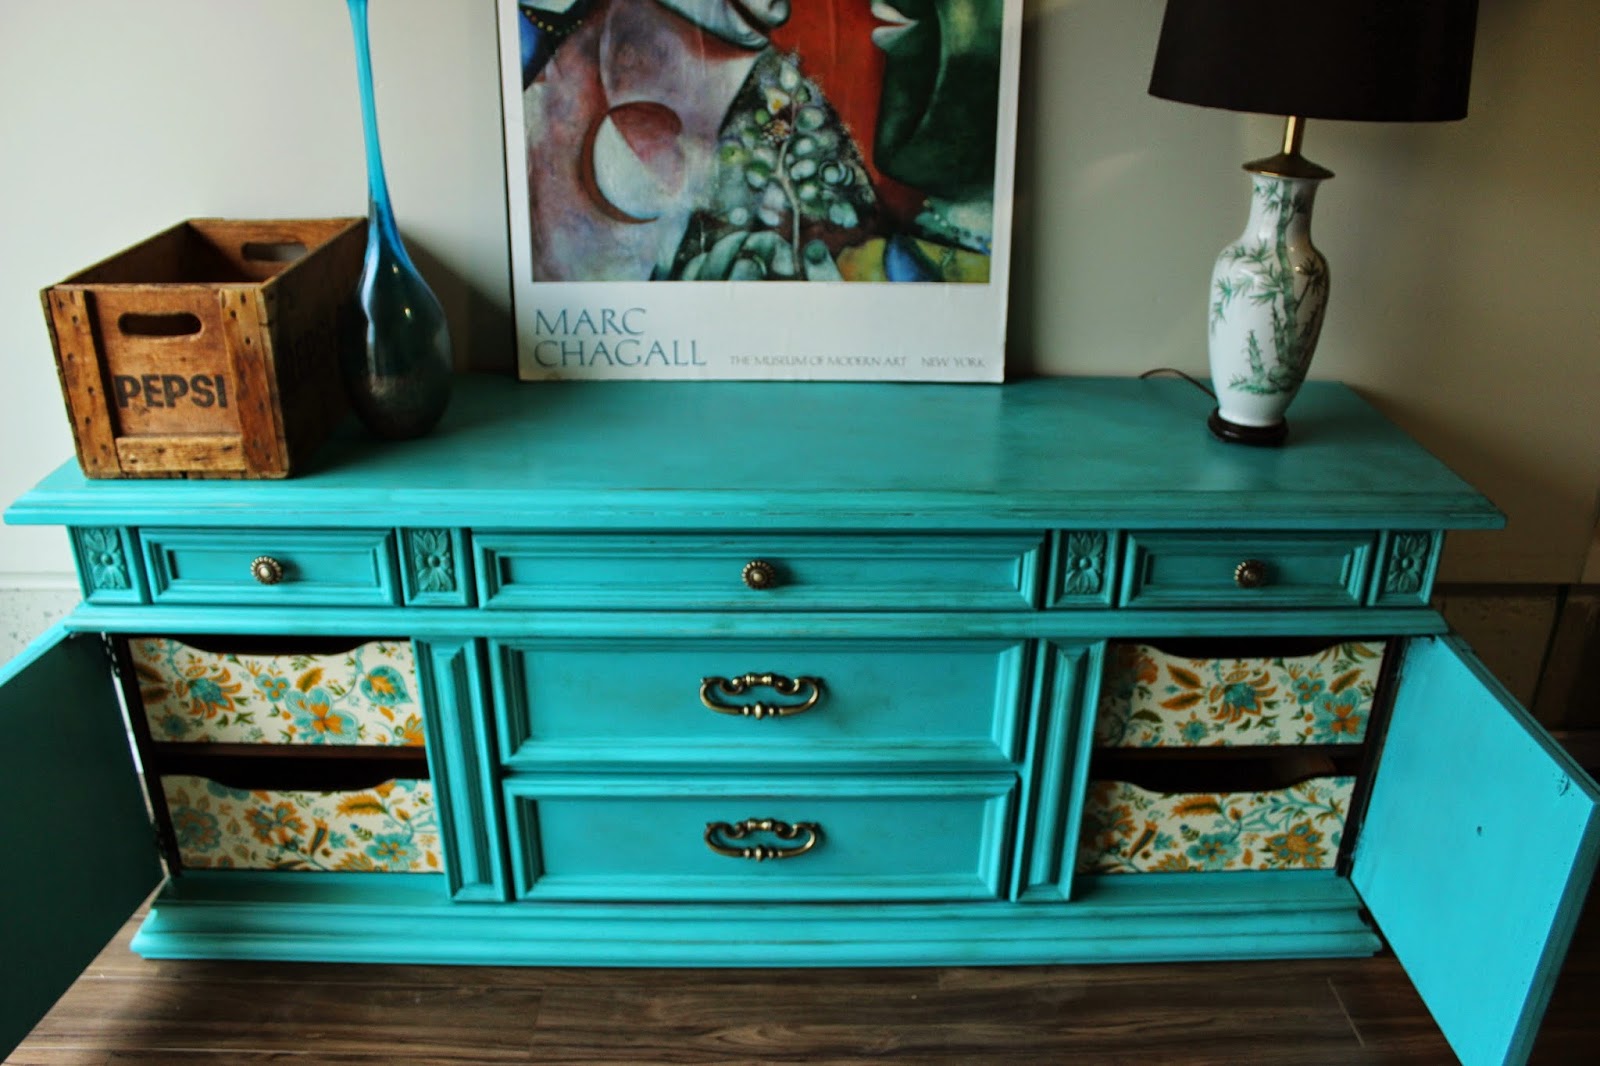
This is the twin of the mint armoire (HERE) that I recently painted.  The pair of them were quite the handful and nearly resulted in an emergency room visit with amputation due to frostbite.  This piece itself is almost 80" wide.  It is a mammoth, in both weight and stature.


I custom mixed up this colour using remnants of other colours.  I actually mix up my own paint all the time.  I buy the paint in gallons un-tinted, and then I get the tint separately in quart sized cans.  It is more cost effective this way, and also I am not committed to a huge can of any particular colour. I actually popped into my local Dulux store last night to ask for some of my favorite cobalt/navy blue tint, I only asked for a quart's worth of tint, but he cheerily offered me a whole gallons worth of tint.  I think this offer may have had something to do with the packet of Twizzlers I waved under his nose.  No one can resist a licorice strap.


I can't remember the colours I used for this piece but there was a lot of green in it as is evident in the pictures.  I didn't want the piece to be so bright that it looked too 'childish', so I made sure to be liberal with the dark wax.  The piece was painted with chalk paint, and then I waxed it with Annie Sloan Clear and Dark wax.


I kept the hardware original on this piece, I just buffed it up a little bit to refresh it.


The most time consuming part was the distressing which I did by hand.  Getting into all of the details shown in the picture below took a fair bit of time.


I again used my vintage Eaton's wallpaper on the drawer facings.  This paper is so versatile, I have used it on so many pieces now.  It goes great with blues, greens and turquoise colours.

 
Here is the before during the sanding process.


Vintage Set with Great Hardware

The pictures really don't do this set justice.  It is such a quality set, it was manufactured by a company called 'Canadian Furniture Company' which I have never heard of, and I would estimate that it was made in the 1960s.  It is solid and very unique.


I picked up some Benjamin Moore Aura for this set.  I actually mixed up to shades of the Aura, one in a creamy white and the other in a more pure white to create this shade which is just a bit creamier than a pure white. 
 
I sanded everything back enough just to take off the original sheen and ensure that my primer would stick well.  I vaccumed up all of the dust, and then I washed everything down to make sure that there was no dust remaining.  I then let everything dry before spraying on my primer coat. I used my Critter sprayer to spray the primer and the first two coats of Aura. I am currently in the process of writing a review for the 'CRITTER' sprayer, but one thing I notice is that the sheen of the paint changes in the spraying process.  So this aura was a Satin finish, but it sprayed almost like a matte/eggshell.


To overcome this, I did the last coat by hand with a roller/brush combo so that the satin sheen was accurate and even.  This really allowed me to appreciate the levelling power of the aura.  It levelled out so nicely that you could barely see the brush strokes.

I love the hardware on this set, and in truth, if it didn't have this hardware, I don't think I would have purchased it.  It just gives such a wow factor, especially the hardware up the top.  It was pretty aged and mottled looking, so I buffed it all up by hand back to a soft gold sheen which took at least an hour.


I did a top coat protection of satin sheen polyacrylic just on the tops of all the pieces to help prevent scratching on the paint as they will get the most use.


Im really happy with the AURA, I had read some reviews (after I bought it) that suggested that it had a long 'tacky' period after being painted and that it didn't harden that well, but I have to say that I haven't noticed it on these pieces.  I think it turned out great and feels very durable.


The blurred before!


Tuesday, 9 December 2014

Navy Dresser with Added Hardware


This piece was a great deal and was in very good condition for a solid heavy piece (probably 1970s).  It was bland though.  Mr. Chuckle's took a look and was a little nay-say-ee about her.  I tsk'd him and pointed out his lack of vision. I on the other hand had plenty.  I knew straight away that I was going to add these knobs, I wasn't positive about what colour to use...but when I remembered I had this navy tint in stock I thought, why not, I've never done navy before.


I decided to go for a time-worn, rustic look.  I gave a light sanding and then used chalkpaint (DIY) and I waxed everything.  I think I used about 3 coats of the paint, and then I distressed all of the edges to show the original blonde finish.  I waxed with clear wax only as I'm not sure dark wax would have achieved much of a difference.


I picked these knobs up at a local store, I thought the gold and white would tie in nicely with the navy.  Finding the centres of all the drawers was tricky.  I thought I had a system worked out, but when I mapped it all out and put the drawers back in and lined them up, well, it was uneven.  So I had to call Mr. Chuckle's in for some technical consulting.  He just loves helping.


I normally get frustrated with the splotchy appearance of wax on the tops of large pieces, but it 'works' on this piece because its all rustic looking any way.  On clean, non distressed pieces, I prefer to use a poly for a perfect finish.  Anal.

 
Here is the before.  It only had hardware on the top drawers.  Snooooooze-ville for sure.
 

Thursday, 27 November 2014

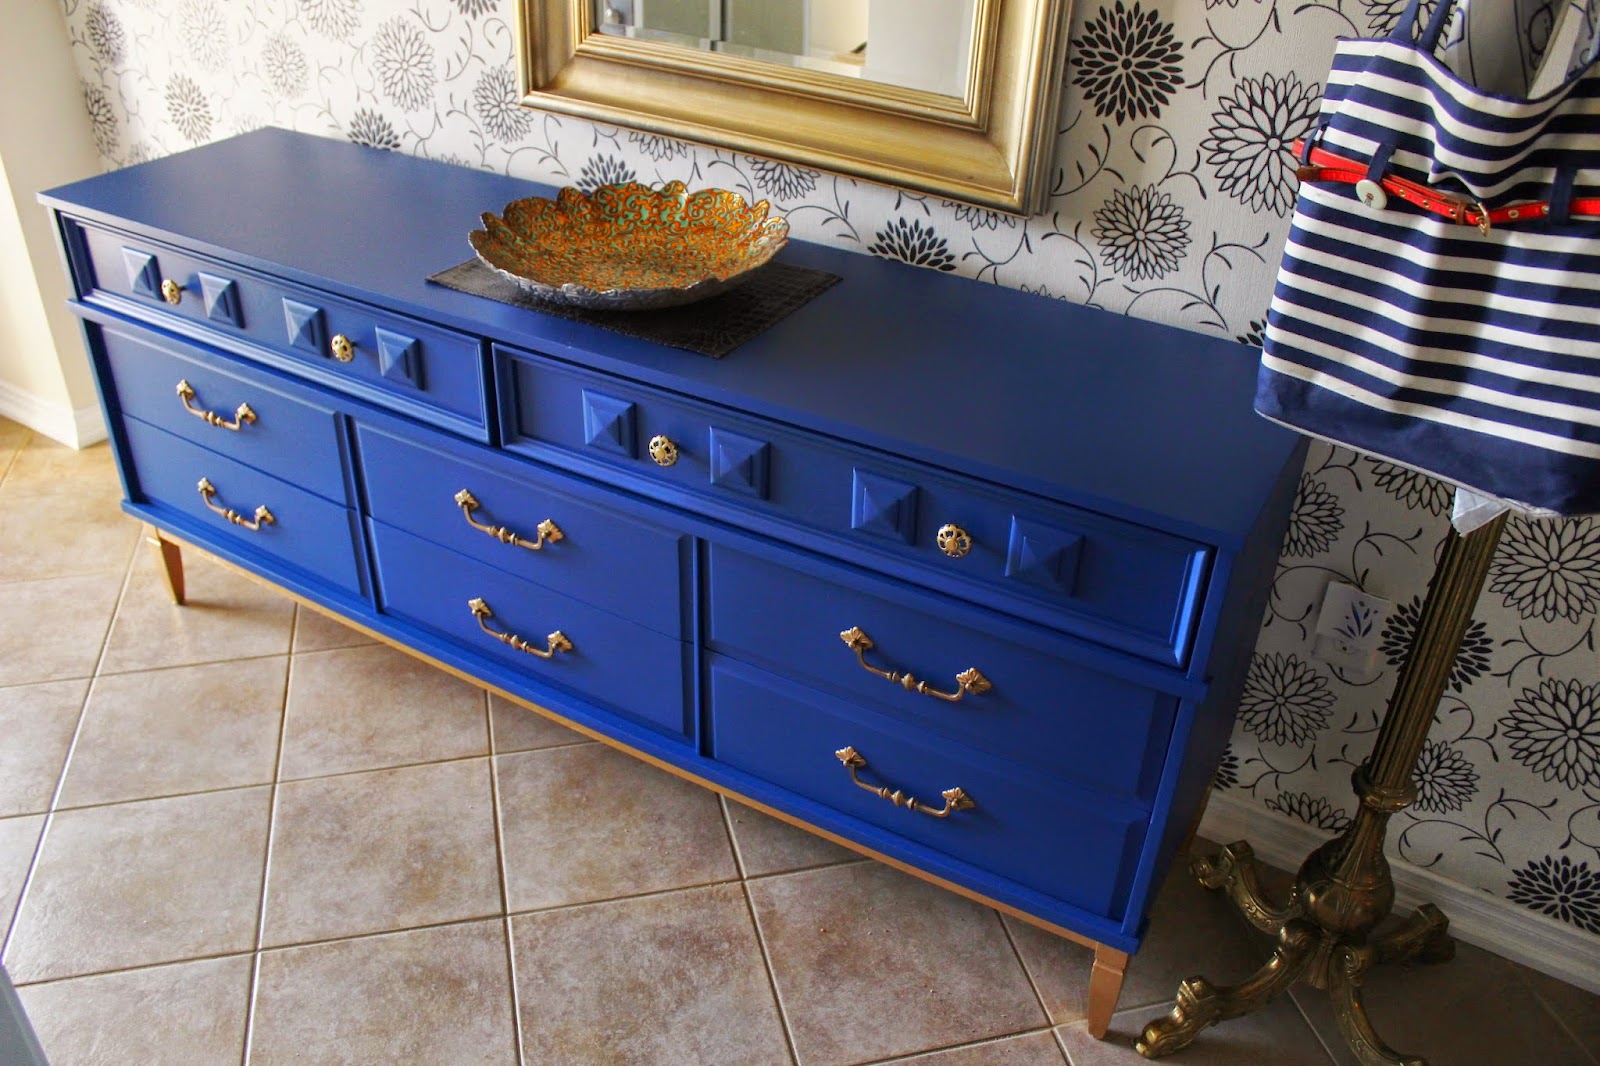
Blue and Gold Dresser with Sticky Drawers

I love this colour combo.  I confess, I do it a lot.  Eeek.  Its hard to always be creative when something is so popular and you love it too!  The colour is so sophisticated and warm, and as a bonus, it has good coverage.

 
I picked this piece up at a really good price because the drawers were sticky. 'no, problem' I thought, 'easy fix'.  Bah. How wrong a girl can be.  I spent hours Hours HOURS running the orbital over drawer edges sanding and plaining away to get things to fit and run smoothly.  I suspect its fair to say that I spent more time fixing the drawers than actually painting the piece. 

 
I actually almost forget the painting part, because I am still shuddering (literally and figuratively) from all the sanding.  I do remember that I was able to detach the legs and bottom trim and paint them separately,   I used the critter sprayer to paint the blue, and the gold was done with Krylon Spray paint.

 
I topped the piece with satin sheen polyurethane.

 
Hardware got a dose of rub-n-buff in antique gold.


And the before (minus the legs which were off prancing around somewhere).