Wednesday 26 March 2014

Camera fail and a two-faced Hollywood Lady

Well don't I feel like a tool.  After finishing my latest project, I brought her in for some staging and carefully unzipped my new camera from its little bag and starting taking snaps.  I usually shoot in A.  So I control the aperture and I let the camera choose the speed.  I figure this is a good way to wet my feet into the world of shooting in manual mode.


Several minutes into the little photo shoot, it became all too apparent that Ansel Adams I am not.  I could not, despite all my fiddling and experimenting get a picture with a decent light balance.  I metered here, I metered there, I metered just about everywhere.  But unlike the little golden haired girl in the three bears, I could not find the bowl that was 'just right'.


 Im ashamed to admit this..my head is hanging low and Im dripping with self loathing...but I got so fed up I grabbed my phone and used it to take the pictures in the end.  After all, it has taken reasonable photos for me since the beginning of my blog's existence.  It is awesome because it has a 16mm lens (wide angle) which allows me to fit the whole girth of those big beasty pieces I like to paint into the shot.  My high tech studio also doubles as a hallway. Hallways can be big, I know.  In proper grown-up houses they can even inspire words like 'grand' and 'magnificent', but in my little abode, 'narrow' and 'squishy' might bet more appropriate adjectives.


Anyways, so here are the pics taken not with the $XXX camera that is practically brand new, no here are the pictures taken with the three year old, been dropped too many times, phone camera.  You enjoy them, and feel free to teach me how to use my camera proper. Ill be in the shower trying to scrub away the shame if you need me.


This piece was a great find though!  Solid wood and in excellent condition.  The top did have some marks, so I stripped and sanded it back to the bare wood and re-stained in dark walnut.  I topped with three coats of polyurethane in a satin sheen, it looks wonderful! Yep, a little pat to myself there.   I applied the poly with a sponge roller and than quickly went over it with long brush strokes to cut out all the bubbles.  Worked great, narry a bubble left behind. A nice smooth even finish...something I always struggle to get with a wax.


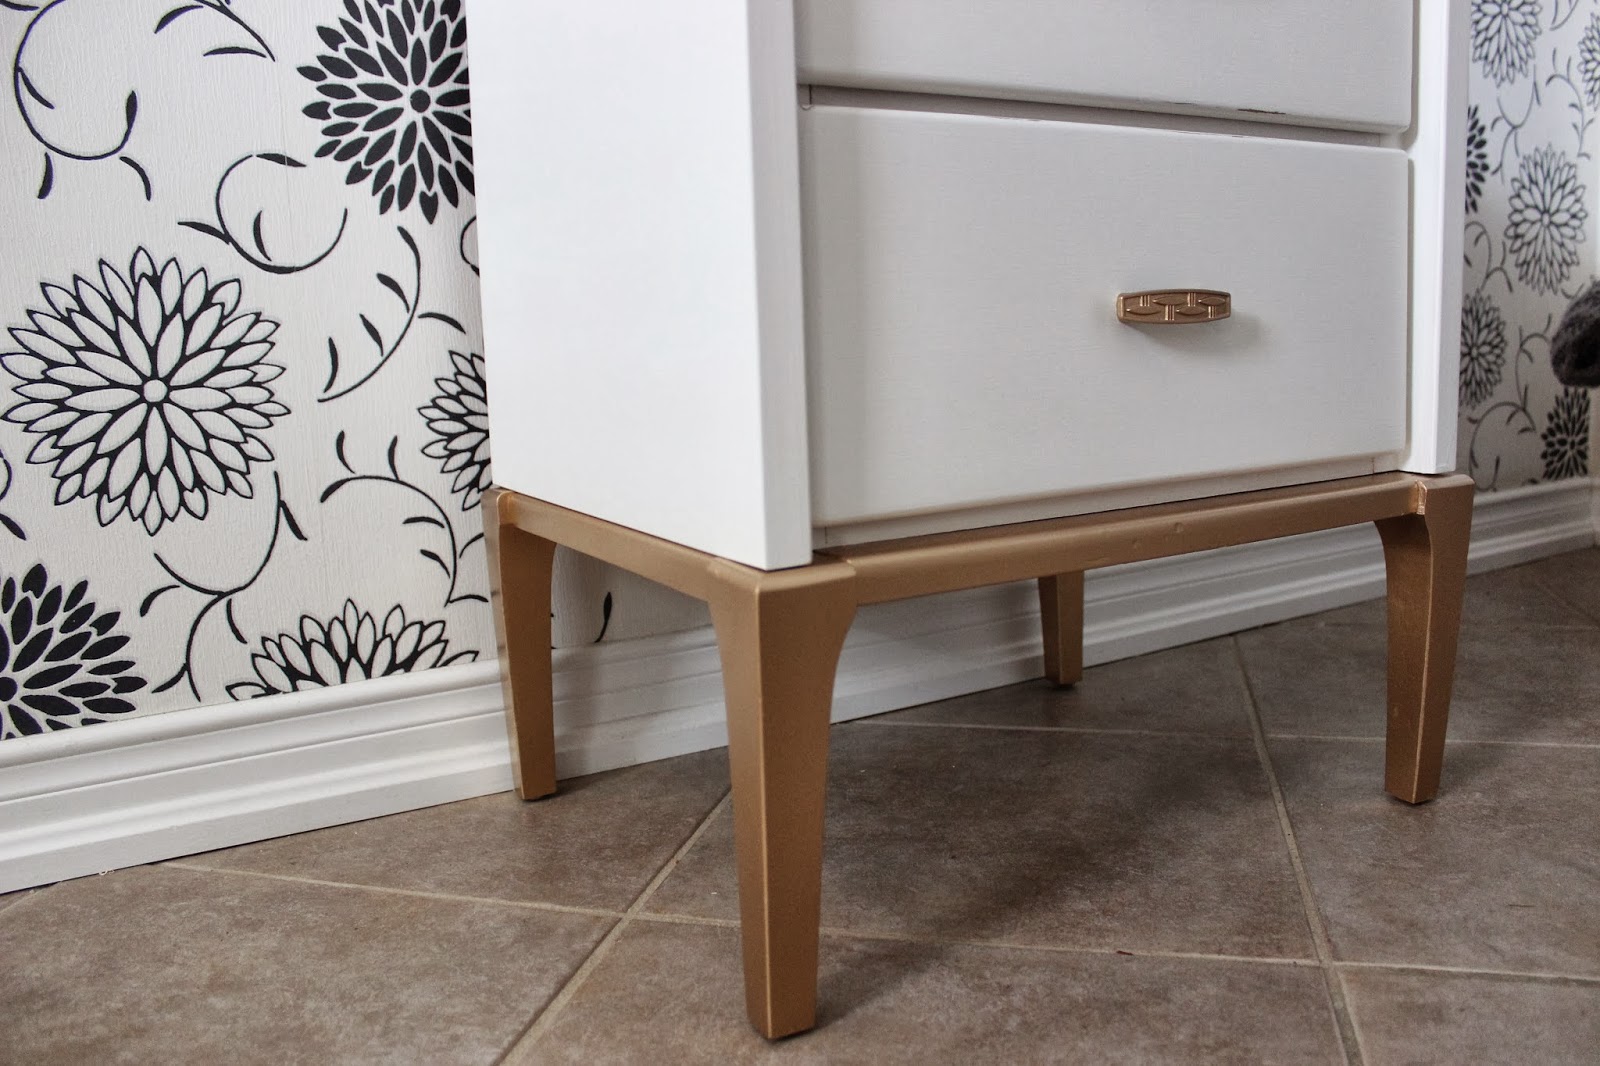
I wanted to incorporate just a hint of chic off-white, so I painted out the three middle drawers as well as the framing and legs - also in a satin finish.  It all turned out really well and I am enjoying the temporary home she is making in my hallway.


That's it, that's all folks!


Friday 14 March 2014

Going Retro with Black and Gold

Hi Peeps!  The latest and greatest - black and gold.  This cute pair of retro cuties virtually fell into my lap.  The furniture findings have hit a bit of a dry patch of late round these parts, so I was very happy when a kind soul donated these guys to me.


I virtually never paint in black, but I was inspired by a picture I came across whilst perusing painted furniture on google which was black with gold hardware.  Why not? I thought.  I could use a shake up.


I gave everything a nice sand and cleaned the pieces both down.  I had some Ben Moore Advance in a slate-black colour that I decided to turn into chalk paint.  It turned out great and the adhesion is awesome.


 I applied two coats, sanding after both, and then finished with clear wax which I had buffed.


The hardware got the ol' rub-n-buff treatment to spruce it up a bit.  I initially thought about changing the hardware, but it really does have a cute retro feel, and plus, I was feeling a little lazy to fill in all those holes.  ;)


Keeping with the retro theme, I highlighted the recessed lines in the middle panel with cream, and I also painted one thin cream stripe down each of the front legs.  


Its definitely an improvement on the before.


The matching tallboy got the exact same treatment.  A cute little pair they make!


Wednesday 12 March 2014

More Gold Dippin'

I picked up this cute little set.  I was drawn to the legs.  Love em!  I think legs are one of the factors that can make or break furniture. And these ones are tall with great lines.


I decided to continue with the gold dipped theme and paint out all three pieces as a set. I wasn't looking forward to taping off the legs and lower frame and trying to get a clean line where the dresser meets the base, so on a hunch I upended the nightstand and saw a bunch of screws.  '..It couldn't be that easy..' I thought to myself, but inserted my drill into one of those holes anyhow.  A few minutes later I did a little tap dance as I realized that all of the bases detached from the main unit...this translates to 'Super Duper easy to Paint with spray paint!'.


I painted out all of the main units with a cream chalkpaint.  I sanded well, cleaned and primed too.  I then topped with two coats of chalkpaint.  The dressers were already white to begin with, so it didn't take too many coats for good coverage.


I hand waxed and buffed to a soft sheen.  I also did a very light distressing on the edges to allow some of the darker wood poke through.


After detaching the bases, I sanded them all well and spraypainted them gold.  I also sanded and spray painted the hardware gold as well.


This set didn't take nearly as long as the french buffet I did in my previous post.  That is one of the beauties of straight lined furniture and the fast drying powers of chalkpaint!


I forgot to take a before picture of this set, but it was a dingy cream and all of the drawers had a blurred line gold trim.  My cream and gold looks much better than the original cream and gold!

Gold Dipped French Buffet

Hello everyone.  Well, Mr Chuckles and I survived our month in Peru, and even managed to survive the week long cruise we took after that. :)  My my, I felt spoilt.  Right up until we landed back in this wind-swept, white-washed barren land called Canada, I felt really indulged.  


Peru was wonderful. We did lots of trekking in the mountains (which of course included a tiring ascent up to Machu Picchu) to take in some glorious views.  It was great to escape the snow, but Im happy to have my paint brush in hand again too!


So I have been painting up a fury, and my first piece is a gold dipped french buffet.  I used a great cabinet paint by Benjamin moore in a soft cream for the body, and I went for a gold dipped effect on the bottom using spray paint.  


I should have taken pictures of all the taping off I had to do in order to prevent the spray paint from marring up the cream paint, but of course I forgot.   


I opted to only dip the front section in gold and not the sides as I prefer it this way. I finished the hardware in Rub-n-buff ( I love this stuff!)


I think it turned out stunning and very chic. Much nicer than the before.