Thursday, 30 April 2015

Canoeing in the Cold

This little lady is down and out! I went on a canoe camping trip with Mr. C and some friends this past weekend and it was frigid.  The nights went down to minus 5.  Brrrrrroni.  Our friends were nice and warm in their posh winterized tent, but Mr. C and I were trying out a little lightweight two-person tent (read coffin) that we are (were) thinking about taking on a cycling trip to France in the summer.  

 
It was horrible.  I'm usually an avid late night pee-er, but this tent was so impossible to get in and out of that my bladder had to hang on, and my eyeballs were floating by the morning.  I had more ease crawling in and out of the VC tunnels in Vietnam a few years ago then I did this 'tent'.  We couldn't even lie straight in the thing as the toe area was fully taken up by the air mattress, so we found ourselves contorting at odd angles to try and squeeze our skin into the cocoon.  Good thing neither of us are that tall.


On a scale of 1 to 10 I would give this tent a zero.  And to top it off, it had no heat retention.  I was a shivering mess come morning.  Fortunately the rest of the trip was a success apart from the colds Mr. C and I both lugged home with us.

 
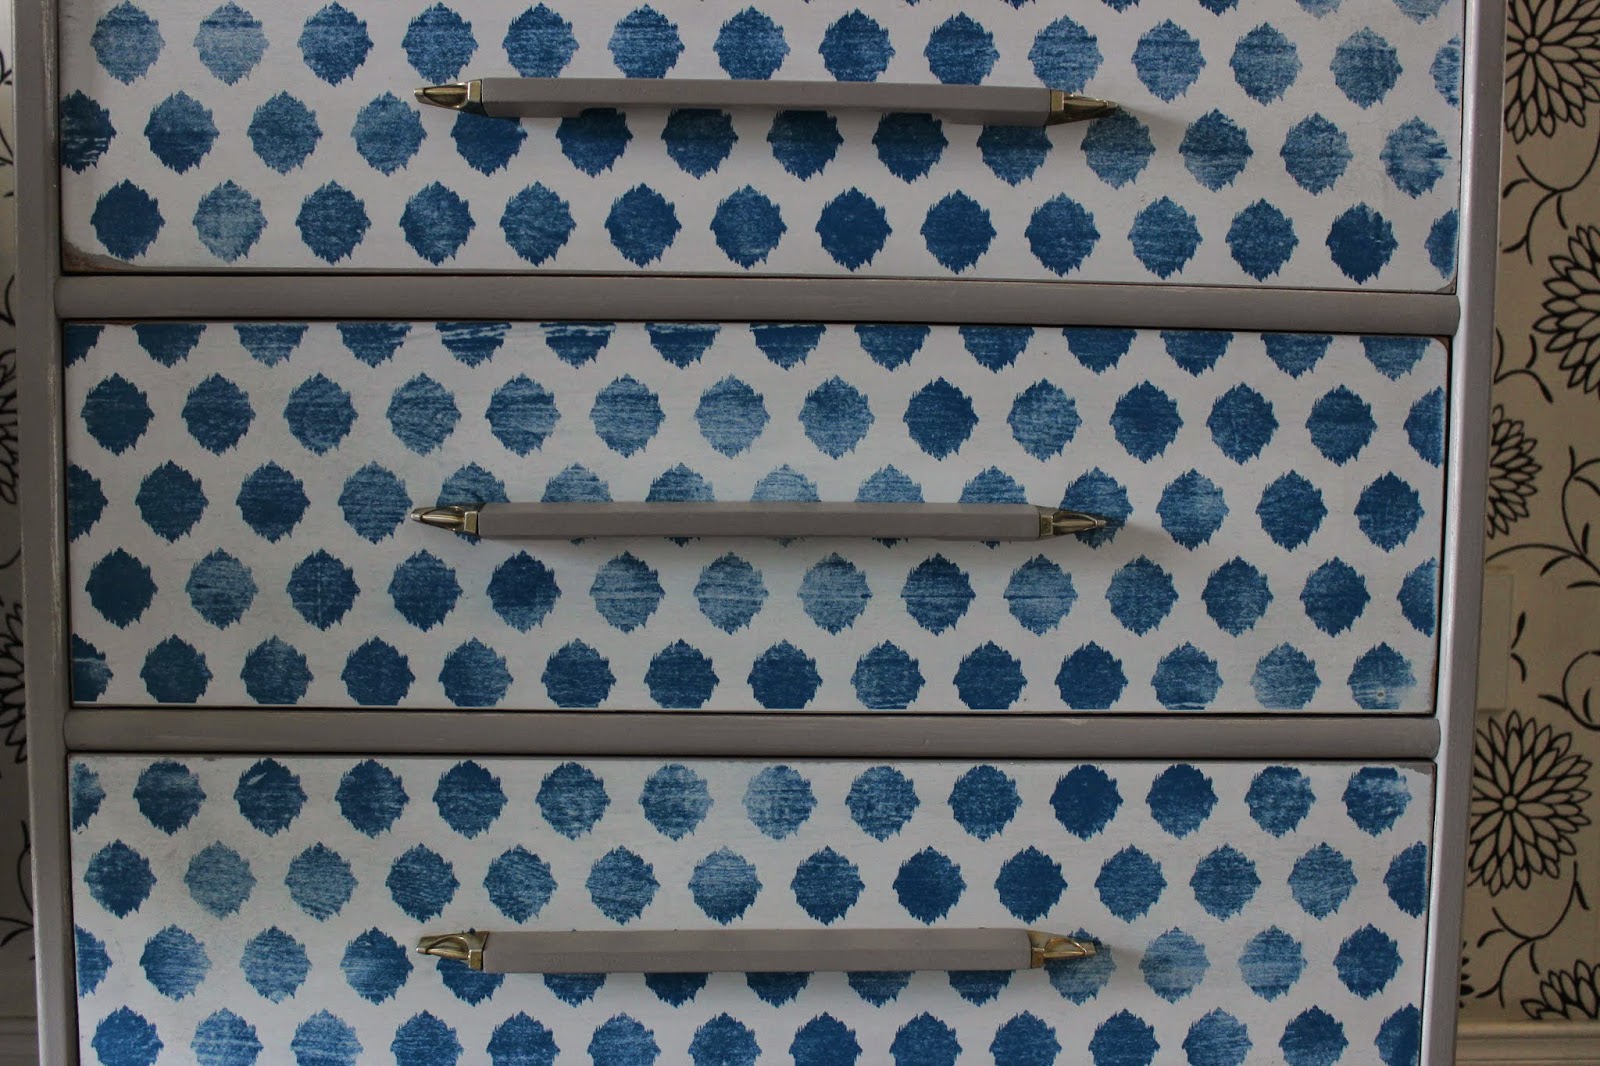
But onto some furniture!  This tallboy dresser is a great solid wood 1960s piece that was part of a 3-piece set I picked up.  It came with a desk which I painted mint HERE, and a 6-drawer lowboy I finished in gray HERE with a wallpaper accent.  I actually wanted to carry the wallpaper over to this piece as well, but I didn't have enough left.  In fact I am running low on a few of my favorite papers, so I decided to use this IKAT style paper which I have used before HERE, but I opted for a distressed finish on it this time.
 
 
The top of this piece was in a very cracked condition.  The old finish was about an 1/8th of an inch thick and took about two hours to sand off!  Because I went down to the bare wood, I made sure to prime with Zinsser BIN before painting to stop the dreaded bleed through in its tracks. The wood grain is thick and very visible through the paint still which looks awesome.

 
I painted out the body of the piece in a light gray chalk paint, distressed lightly around the edges.  I painted the top drawer white, and then I modpodged the distressed IKAT paper onto the drawer facings.


The original vintage wood pulls were finished in the same gray as the body, and the metal hardware was buffed to a soft silvery/gold.

Definitely a whimsical piece, but I think she looks adorable!


Sunday, 19 April 2015

A Motley of MCM Pieces

I was going through my files and realized I had lots of MCM pieces that I haven't posted about.  Sometimes I don't feel an urgency to post pictures of pieces that have a similar look to pieces I have done before.  I think I have quite a few cobalt blue and gold pieces I have done too. But if I were to post them all I'd might be mistaken for doing the same 'look' over and over again.  
 
 
But I thought why not do a little motley of some of the nice two-tone mcm pieces I have done recently.  For quite a few of these pieces I actually wanted to refinish the entire piece rather than do a two tone, but there was always a chunk of veneer missing somewhere that would have been beyond my ability level to fix.  I have tried staining 'stainable woodfiller' but never had much luck with it.

 
For most of these pieces I was able to just touch up the original drawer facings with just a bit of gel stain.  It covers the nics and scratches and works a bit like a magic eraser. The piece above had a wonky back leg, but Mr. Chuckles was able to work his magic and fixed it up great.

 
For all of the pieces I prepped by sanding and wiping down all of the dust before priming (in some cases I needed to break out the Zinsser BIN to stop bleed through) and painted in either Cabinet Coat, or Aura.

 
This coffee table was in great condition, but there was one huge coffee ring water stain on the top level which necessitated me refinishing both the top and main level tiers for a uniform look.  The old finish sanded off very easily, but that water stain ran so deep that I was afraid I was going to sand right through the veneer.  In the end I tried a trick I found on the internet to rub a hot iron over the stain (after I had removed the old finish).  At first I didn't think I was having much luck, but as I kept going, the stain gradually became less noticeable.  After I re-stained and sealed with polyurethane it isn't noticeable at all.

 
This piece was stunning and I wanted to just refinish the whole thing as the wood grain was so gorgeous, but it had three separate chunks of veneer missing from the body which would have been a nightmare to try to fix, so in the end I went with a two tone look.  I also refinished the drawer facings on this one as they were in pretty rough condition. The cute little pulls are original.


Saturday, 18 April 2015

Restoration Hardware Style Mirrors

I was flipping through the latest addition of the Restoration Hardware Catalogue recently, and I happened across this picture here.


I loved the matte black cabinets and the distressing.  I never seem to paint anything black, and when I picked up this great dresser set with two gorgeous mirrors I knew I was going to paint the mirrors black.


They are so beautiful and tall and fairly contemporary given that they are vintage.

 
I sanded them down gently as I still wanted the wood stain to show through once I distressed them.

 
I painted everything matte black, and then use course grit sand paper to sand all of the edges (this was the most time consuming part).  I then sealed everything with wax.

 
I love how they turned out. They would look great above his and her bathroom sinks.  I wish I had a pair of those to hang them above for me.


Friday, 10 April 2015

Not all she was cracked up to be

This piece was posted at a good price, so I raced the Mazda three towns over to be the first to pick her up.  Caught up in my haste, enthusiasm and hunger, I didn't really take a good look at her before I loaded her into the Mazda, a rookie mistake, I know. 


No, it wasn't until I got her home that I realized she was going to need some cosmetic surgery to make her stage worthy.
 
 
I slowly set to work in between coats of painting our house and gradually she was ready to be painted.  I sanded the entire piece down and opted for a soft romantic feel using 'Cottage Paint' clay and chalk paint.  I added some green and gray tint to my beige paint and this beautiful soft colour was the result.

 
I think the original hardware is adorable, all I did was kiss it with a bit of paint to soften it up.

 
A close up shot which shows some of the paint strokes, I used wax as a top coat on this piece because I was happy for that smudgy 'aged' imperfect look.  Just clear, no dark.

 
I added the distressed gray and white chevron pattern for a touch of whimsy, and kissed the knobs with the same green as the body.


I made sure all the veneer was glued down firmly with wood glue and clamps, you know how old veneer can bubble and ripple.  But I wasn't overly concerned about making sure the veneer was perfectly smooth.  Its an old piece, she's bound to have a few wrinkles.

 
The flowers are real, peonies.  We got them at Easter, lord knows where they were grown, it certainly wasn't anywhere near this freezing cold wasteland.  Spring is sure taking its time this year.


The before.  I removed the top piece for a more contemporary feel.

Tuesday, 7 April 2015

Wallpaper and Gray Dresser

 
A new piece to share!  This is part of a trio set which is solid wood.  Great vintage furniture. I love it.  I was very indecisive about what to do with this piece. I knew I wanted to do something a little more unique, but I wasn't feeling all that inspired.

 
During this time of quiet contemplation, Mr. Chuckles and I repainted a good portion of our house.  We went with a soft gray and also updated a geometric feature wall we have with some new colours.  It all turned out great (although it took the better part of a week).  One night, exhausted on the couch I was admiring my living room wall paper when I Eureka'd that it would look great on the dresser.

 
I still had a little bit left over from wallpapering the living room and decided to put it to use.  I first sanded and primed the drawer and then cut the wall paper so that the pattern was continuous over the three drawers.

 
I painted the opposite side of the drawers with a mid-tone gray that would pull the gray out of the paper.  I used chalkpaint as I wanted a soft romantic feel.

 
I painted the wrap of the piece in a soft gray, it pulls a little white in the pictures, but it is a very soft gray.

 
The original wood hardware was painted in the same soft gray as the wrap and protected with satin sheen polyacrylic.  I hand buffed the metal fastners to a soft gold.

 
The gray lines on the wallpaper has a lovely soft metallic reflective sheen which isn't remotely visible in this picture.


This is a before of the matching tallboy as I forgot to snap a before of the six-drawer.