Showing posts with label painted dresser. Show all posts

Tuesday, 15 April 2014

Duck-egg Blue Dresser / Buffet

It must be the gorgeous weather we've been having!  Yep, all 30 hours of that great spring weather put a spring in my step and inspired my colour choices (sadly, the subzero temps and snow have reemerged from their gloomy labyrinth).  I custom mixed this gorgeous colour up, and I think it is perfect for the Easter season.  Light and bright, but still with some gray tones, it reminds me of duck egg.


I used chalkpaint, sanding in between coats for a smooth finish.  The piece was in fantastic condition, and a light sanding was all she needed for preparation.  No holes, no dings, no chips - yay~!


I decided to keep it simple.  Often I do a lot of 'highlighting' on pieces with carved detailing with lighter/darker complimentary colours.  But on this girl, I wanted the result to be understated, so all I did after finishing the painting was seal with a polyacrylic in a satin sheen.  I was going to wax, but I have to admit, I still find that waxing large surfaces (ie, the top of this 74" piece), gives a splotchy and uneven result.  I still use wax, especially on small pieces, but the poly gave a great and even finish, and Im very happy with it.


I bought new ceramic knobs.  They are white with a blue crazing effect.  Very cute and a great contrast with the blue.


I love the great height that this piece has.  It stands at 34" tall which is unusual for a vintage piece in this style (without having legs).  I find 31 or 32" is the norm.  I love tall furniture, I think it looks more stately and commanding.


The drawers have wooden inserts, after I stripped them of their old and dingy fabric, I applied some contemporary gray and white contact paper I have.  A cute little surprise.


There is lots of great storage space in the cupboards, I painted the bases and the backer board, but I left the side walls to add a hint of their original personality.


I was halfway through painting when I remembered to take the 'before' picture - Give me a 'woop-woop' if you have done this yourself!


Wednesday, 26 March 2014

Camera fail and a two-faced Hollywood Lady

Well don't I feel like a tool.  After finishing my latest project, I brought her in for some staging and carefully unzipped my new camera from its little bag and starting taking snaps.  I usually shoot in A.  So I control the aperture and I let the camera choose the speed.  I figure this is a good way to wet my feet into the world of shooting in manual mode.


Several minutes into the little photo shoot, it became all too apparent that Ansel Adams I am not.  I could not, despite all my fiddling and experimenting get a picture with a decent light balance.  I metered here, I metered there, I metered just about everywhere.  But unlike the little golden haired girl in the three bears, I could not find the bowl that was 'just right'.


 Im ashamed to admit this..my head is hanging low and Im dripping with self loathing...but I got so fed up I grabbed my phone and used it to take the pictures in the end.  After all, it has taken reasonable photos for me since the beginning of my blog's existence.  It is awesome because it has a 16mm lens (wide angle) which allows me to fit the whole girth of those big beasty pieces I like to paint into the shot.  My high tech studio also doubles as a hallway. Hallways can be big, I know.  In proper grown-up houses they can even inspire words like 'grand' and 'magnificent', but in my little abode, 'narrow' and 'squishy' might bet more appropriate adjectives.


Anyways, so here are the pics taken not with the $XXX camera that is practically brand new, no here are the pictures taken with the three year old, been dropped too many times, phone camera.  You enjoy them, and feel free to teach me how to use my camera proper. Ill be in the shower trying to scrub away the shame if you need me.


This piece was a great find though!  Solid wood and in excellent condition.  The top did have some marks, so I stripped and sanded it back to the bare wood and re-stained in dark walnut.  I topped with three coats of polyurethane in a satin sheen, it looks wonderful! Yep, a little pat to myself there.   I applied the poly with a sponge roller and than quickly went over it with long brush strokes to cut out all the bubbles.  Worked great, narry a bubble left behind. A nice smooth even finish...something I always struggle to get with a wax.


I wanted to incorporate just a hint of chic off-white, so I painted out the three middle drawers as well as the framing and legs - also in a satin finish.  It all turned out really well and I am enjoying the temporary home she is making in my hallway.


That's it, that's all folks!


Wednesday, 12 March 2014

More Gold Dippin'

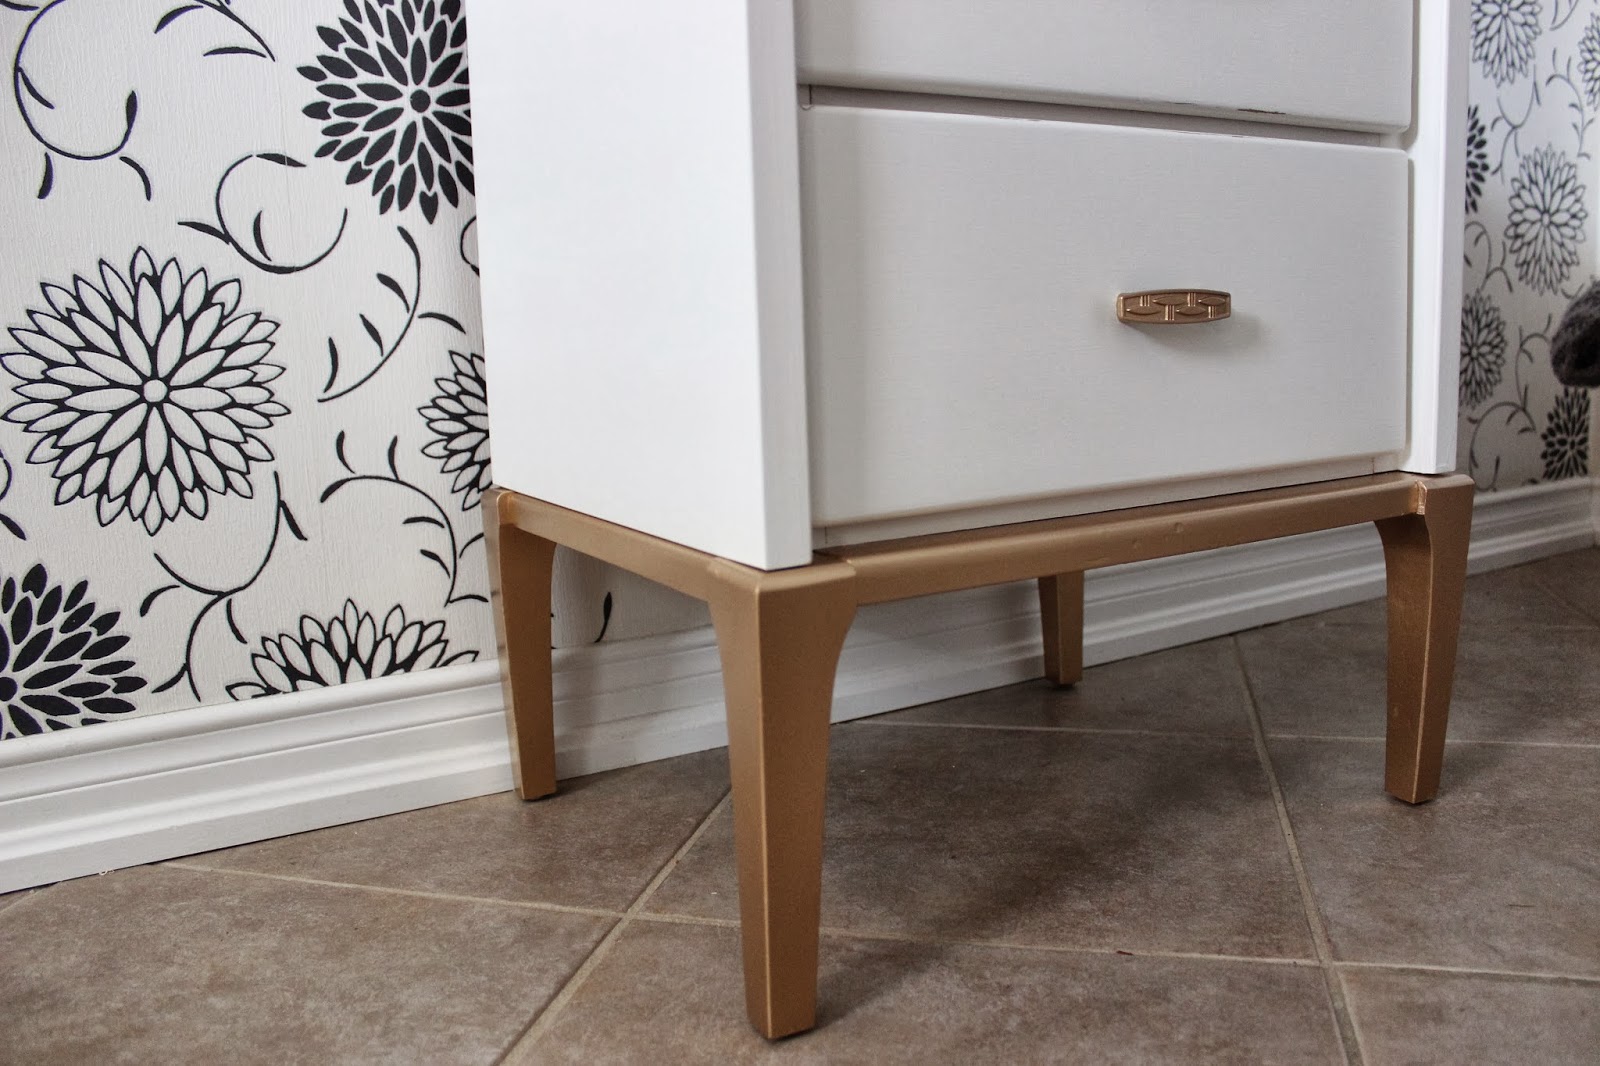
I picked up this cute little set.  I was drawn to the legs.  Love em!  I think legs are one of the factors that can make or break furniture. And these ones are tall with great lines.


I decided to continue with the gold dipped theme and paint out all three pieces as a set. I wasn't looking forward to taping off the legs and lower frame and trying to get a clean line where the dresser meets the base, so on a hunch I upended the nightstand and saw a bunch of screws.  '..It couldn't be that easy..' I thought to myself, but inserted my drill into one of those holes anyhow.  A few minutes later I did a little tap dance as I realized that all of the bases detached from the main unit...this translates to 'Super Duper easy to Paint with spray paint!'.


I painted out all of the main units with a cream chalkpaint.  I sanded well, cleaned and primed too.  I then topped with two coats of chalkpaint.  The dressers were already white to begin with, so it didn't take too many coats for good coverage.


I hand waxed and buffed to a soft sheen.  I also did a very light distressing on the edges to allow some of the darker wood poke through.


After detaching the bases, I sanded them all well and spraypainted them gold.  I also sanded and spray painted the hardware gold as well.


This set didn't take nearly as long as the french buffet I did in my previous post.  That is one of the beauties of straight lined furniture and the fast drying powers of chalkpaint!


I forgot to take a before picture of this set, but it was a dingy cream and all of the drawers had a blurred line gold trim.  My cream and gold looks much better than the original cream and gold!

Thursday, 23 January 2014

Getting a Pewter Look on Hardware

Just a couple of materials and a few simple steps is all it takes


I have done this look on a couple of different dressers now. It all began with the beautiful dresser below. 


 I had previously refinished this dresser in turquoise (HERE) and was over-the-moon to find the exact same gorgeous dresser in excellent vintage condition. It has wonderful raised detailing and I added the legs to give it extra height.


There was nothing wrong with the hardware in its original state, but it was so dark that it was difficult to appreciate all the ornate carved detailing.  Lightening it up and glazing it really highlights all of that beautiful craftsmanship.


I drew inspiration from a technique I have used on some old candlesticks to get a 'pewter' looking finish. This candlestick used to be glossy red and it really suited the Japanese inspired furnishings of the house I shared in Sydney (yep, I brought these guys all the way home to Canada), but I gave them new life to fit in with the decor of my new digs.


I washed the hardware well using baking soda and vinegar to get the gunk off.  I noticed this did leave a film on the hardware after it dried (probably a chemical reaction) and so I gave all the pieces of hardware a good sanding. Just to give you an idea of the finish. The middle is the original finish, the left is after I sanded/buffed it to a soft gold, and the right shows the residue post soaking. 


I sanded all the hardware really well in order to promote good adhesion for the spray paint.  This was the most time consuming and unpleasant step.  I wore a mask to prevent any of those nasty particles tainting my pristine nostrils. I want to be able to taste my Honeycombs after all.


Next up was silver spray paint.  I used Krylon in a gloss finish.  I did about three coats with 20-30 minutes of dry time between coats. Although the hardware looked great after this step, it really lacked the depth that the glaze provided.


I let the paint dry for a couple of days and kept myself busy doing other things before glazing.  For the glaze I mixed together Martha Stewart glazing medium with some black paint. That's actually an old herbs bottle I mixed it up in. A little of the glaze goes a-l-o-n-g way.


I wiped on the glaze with a dry paper towel and then used a damp cloth to hastily wipe it back off.  I didn't over wipe as I wanted the glaze to gather into the grooves of the detailing and create a darker shadow.  If there were any areas I felt were too dark I just worked the damp cloth a little more.


The picture above shows the difference in steps.  Starting on the right you can see the plate with spray paint, the middle is what it looked like when I covered with glaze, and the left is the end result after the glaze was wiped off.


I allowed the glaze to dry overnight before I sealed everything with a few spray coats of polyacrylic.  I used a satin finish, but I did find that it dulled the finish down to more of a matte finish.  I would definitely consider using a gloss polyacrylic spray for the next time to encourage a bit more luster.


The end result makes a stunning contrast with the white paint of the dresser. You can see another example of where I used this technique below.


It really is amazing how much of a transformation you can make with a little paint, a little imagination, and a little effort. Magic!

If you have any tips for hardware transformations please leave a comment or a link!

Thursday, 31 October 2013

One for the Stag N Doe

What a week.  I have been working painstakingly on a dresser that got quite the overhaul, and some matching nightstands.  It is one of those pieces that turns out to be ten times the amount of work than you expected.  Tomorrow I am buying a nice bottle of bubbly which I will uncork with vigor when it is all done. Not long now. I can see the light.

But lets save that post for another day.  Instead, lets talk about this beauty below.  She is a nice antique piece with a matching mirror.  I decided to donate a piece for Mr. Chuckle's sister's stag n' doe party in lead up to her pending nuptials.  They are raffling off a lot of prizes, and I thought, 'Hey. why not a piece of furniture?'.  So it was with that in mind that I kept my eye out for a nice piece.


I found this one at a steal.  It was at my favorite re-store.  I must have been quick that day, because usually these types of pieces get snapped up quickly.  I was so enthused I walked out without paying.  So literally, a steal.


I did pay on my next visit though, guilty conscience be damned.  It was in rough shape.  Mr. Chuckles and I had to do a lot of sanding and wood filling to bring this lady back to the land of the living. I believe she made a guest appearance on the Walking Dead at some stage in her past.


I love the little key hole details.  They are real locks too.  No keys, sadly. I know a lot of bloggers put knobs on these dressers, which I really like..but Im also a big fan of ring pulls. So I gave them a bit of a buff and left them original.


These pictures are appalling, I know.  I was in a rush.  The camera was cranky.  Dresser wouldn't sit still.  Bad photo session all round.


A bit of the distressing detail. I kept it pretty light all round.  I should also mention that I turned this into a chalk paint using PoP.  I like the patina of chalk paint/wax on these old pieces (I usually use latex acrylic and polyurethane).  I also waxed with MINWAX dark wax.  No clear.  But I find the Minwax dark wax to be subtle compared to most dark waxes, so you dont get that 'staining' in the paint finish.


And below is the before.  Certainly wouldn't stand out in a Miss America Pageant.  But hey, a little bit of make-up, some fancy lighting, and just a bit of well placed Hollywood tape, and whammo, say hello to Angelina Jolie.


HAPPY HALLOWEEN EVERYONE!